

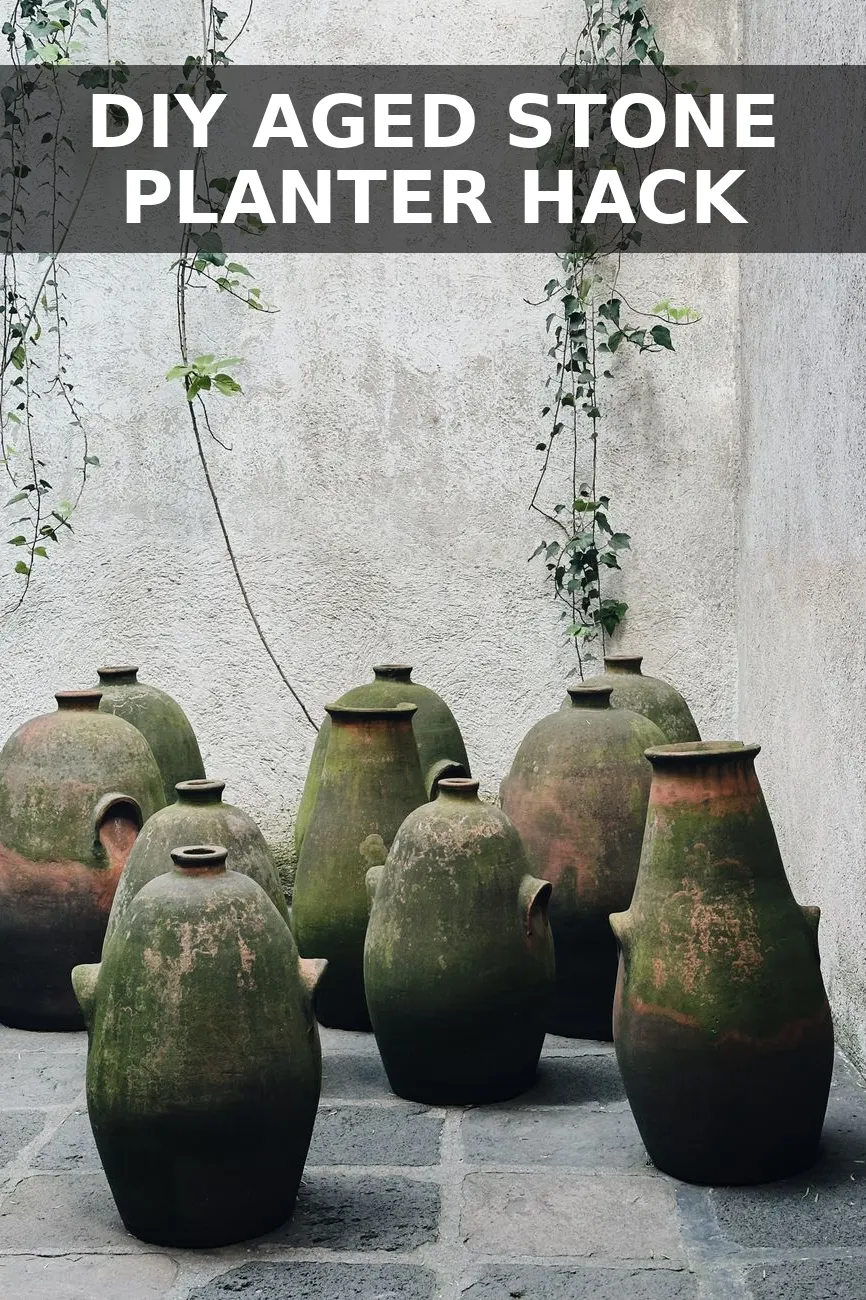
I fell in love with a pair of antique French stone planters in a local boutique last month, but the price tag on the bottom said $350 for the pair. They had that pale, chalky, pitted limestone texture that looks like it spent fifty years sitting in a courtyard outside Lyon. I went home, bought two basic eight-inch terra cotta pots from the garden center for $6 each, and made my own version on the kitchen counter in under an hour.
The Secret Is Building Real Texture (Not Just Paint)
Most tutorials tell you to mix baking soda into white paint and slap it on. That gives you a nice matte surface, but it still looks like painted terra cotta. Authentic antique stone has tiny pits, crusty ridges, pale powdery buildup in the crevices, and darker mineral stains where water settled over decades.
To get genuine depth, you need a base layer that has actual physical body. Premixed drywall joint compound (the basic $5 tub from Home Depot) combined with coarse masonry sand or cornmeal creates a thick paste that grips the porous clay. It lets you sculpt subtle imperfections directly onto the cheap pot.
Much like the technique I used for my fluted pedestal centerpiece, layering physical texture before adding your color washes is what stops people from guessing the base material.
Supplies You Need
- Two plain terra cotta pots: 8-inch or 10-inch standard clay pots ($6 each at garden centers or hardware stores).
- Premixed drywall joint compound: A small 1-quart tub ($5.50).
- Sample pot of warm stone paint: A creamy, warm gray or putty matte latex sample ($5.75).
- Raw umber or dark brown craft paint: 2 oz bottle ($1.50).
- Greenish-grey craft paint: 2 oz bottle for subtle moss patina ($1.50).
- Coarse chip brush and an old kitchen sponge: ($2.00).
- Matte clear spray sealer: Must be flat or ultra-matte ($6.50).
The Step-by-Step Aging Process
- Seal the inside first. Terra cotta breathes and absorbs moisture directly through its walls. If you plant directly inside an unsealed pot later, damp soil will push the joint compound off from the inside out. Spray the interior thoroughly with two coats of clear waterproof sealer and let it dry for 20 minutes.
- Whip up the stone mud. In a plastic container, mix 1 cup of joint compound with 2 tablespoons of warm stone latex paint and a splash of water until it feels like thick frosting. The paint gives the compound flexibility so it won't crack or flake off when dried.
- Trowel and stipple the surface. Using an old putty knife or your fingers (wear gloves), smear the paste over the exterior and around the inner rim. Don't smooth it out like cake icing. Use the flat bristles of a dry chip brush to jab and stipple the wet paste, creating thousands of tiny craters and stone-like pits.
- Knock down the peaks. Let the paste sit for 15 minutes until it feels slightly tacky. Take a damp paper towel and lightly pat down the sharpest spikes, leaving a rough, porous limestone texture. Let it dry completely for 3 to 4 hours.
- Layer the mineral wash. Mix one teaspoon of raw umber paint into half a cup of water. It should look like dirty ditch water. Brush this wash into all the crevices and rims, then immediately blot the high spots with a dry rag. The dark pigment will cling down into the texture, instantly creating centuries-old shadows.
- Add the chalky salt layer. Dip a barely damp kitchen sponge into pure white chalk paint or undiluted joint compound. Dab off 90% of it on cardboard, then gently skim across the raised ridges. This mimics natural lime efflorescence.
- Lock in the finish. Give the whole pot two light coats of dead-flat matte sealer. This protects your hard work without adding any fake plastic shine.
The Budget Breakdown
Here is what I spent to make a pair of matching textured stone urns for my dining room table:
| Item | Price |
|---|---|
| 2 Plain Terra Cotta Pots (8-inch) | $12.00 |
| 1 Qt Premixed Joint Compound | $5.50 |
| Sample Pot Matte Greige Paint | $5.75 |
| 2 Bottles Acrylic Craft Paint (Umber & Moss) | $3.00 |
| Chip Brush & Foam Sponge | $2.00 |
| Matte Clear Exterior Sealer | $6.50 |
All in, this project came out to $34.75 for both pots. That works out to less than $18 a piece for planters that genuinely look and feel like heavy carved limestone salvage. If you already have joint compound or sample paint leftover from making an English country peg rail, your out-of-pocket cost is basically just the price of the clay pots.
Styling and Planting Tips
Because the finish is so organic and textural, these pots look best paired with simple greenery that lets the patina stand out:
- Topiary myrtle or boxwood: The sharp, manicured green globes create a striking contrast against the rough, crumbly stone rims.
- Trailing English ivy: Let a few vines spill over the side to highlight the darker shadow washes around the lip.
- Indoor use: Drop your nursery pot directly inside on top of a small plastic saucer so you never have to worry about drainage water sitting on wood furniture.
Once the sealer cures for 24 hours, the surface is completely durable to the touch. It doesn't flake off when you lift the pot, and the matte texture feels cold and heavy under your fingers just like real quarry stone.


0 Comments